* This color is an additional explanation by Cloudsmart.
Card view overview
One of the four sheet views
Card View is one of the four sheet views available in Smartsheet that provides your team with a highly visual way of working.
Customizable drag-and-drop cards, such as changing display criteria called lanes, give teams a quick overview.
The card view sample isplease use this form.
Can also be used with mobile apps
Card View makes it easy to prioritize and organize your tasks from any device, whether PC or mobile. (Card view was available on the mobile app.)
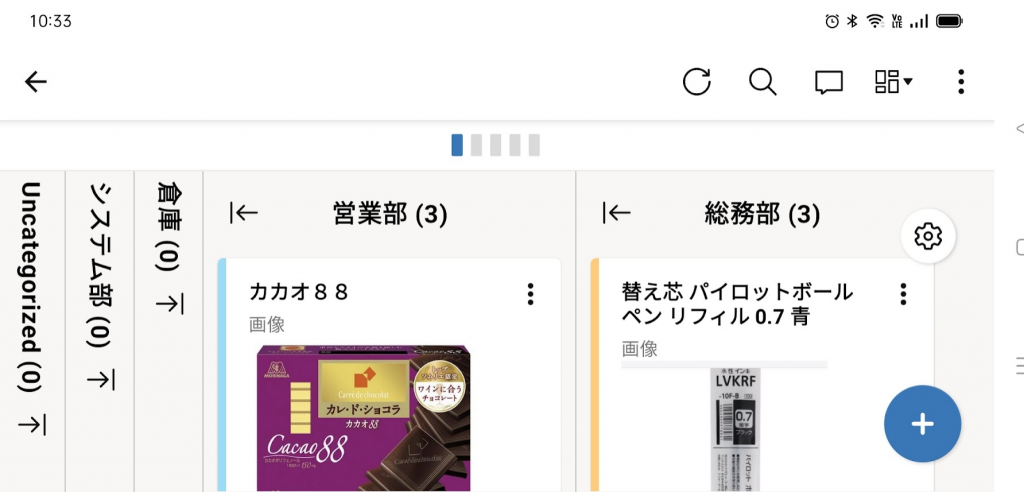
You can create a card view sheet from scratch or view an existing sheet in card view.
Using card view with existing sheets
Requires selectable columns
To view an existing sheet in card view, whether on desktop or mobileDrop-down list, contact list, symbol columnMust be included.These column types define how the data is organized in Card View.
How to use
To use Card View on an existing sheet, first select Card View from the View drop-down menu on the toolbar.
When this is enabled,The sheet turns into a board structured with lanes based on drop-down list, contact list, and symbol column values.
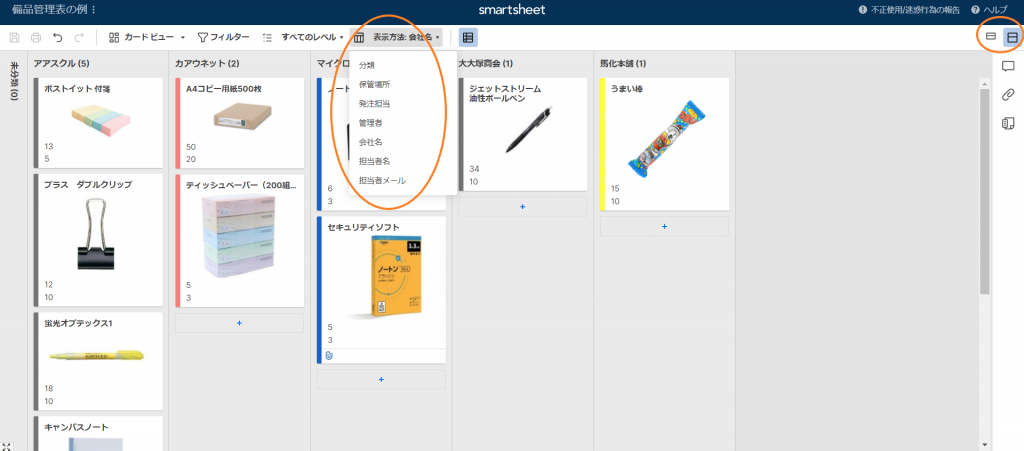
Change the hierarchy
You can change the hierarchy displayed in the card view using the Hierarchy dropdown on the toolbar.
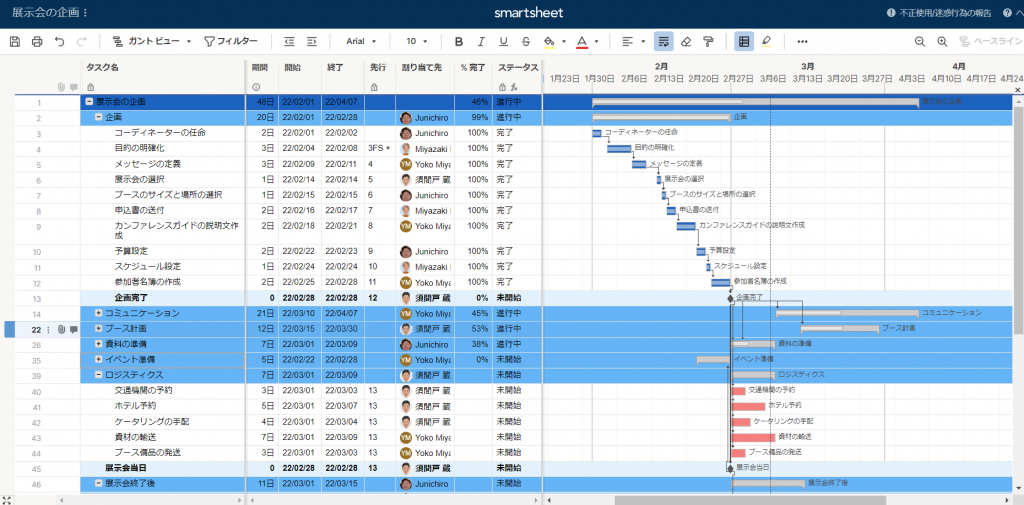
For example, set a sheet with the above hierarchical structure to hierarchical level XNUMX in the card view so that only the actual tasks are displayed.
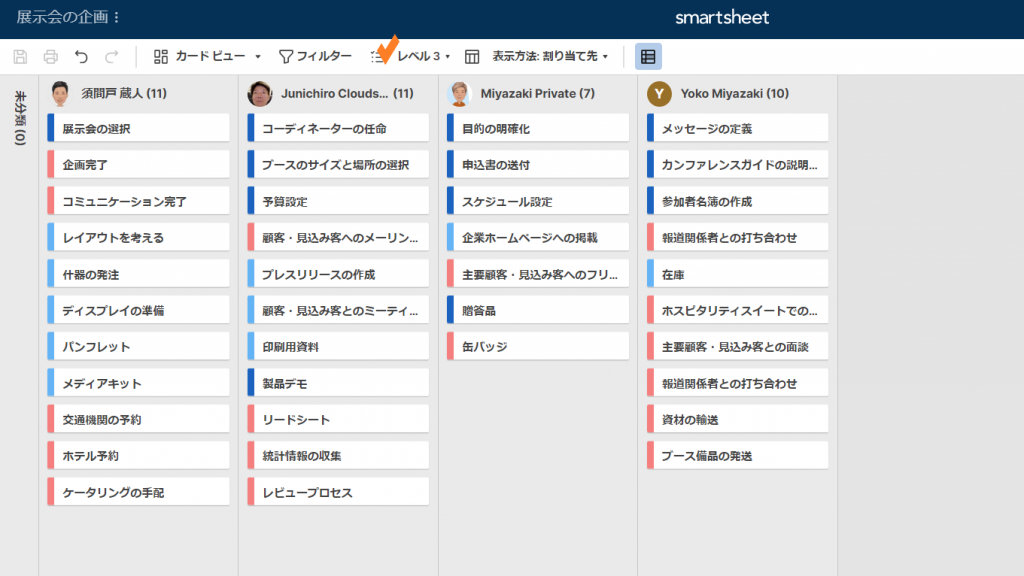
Each row of the grid becomes a card
Each row of the grid is represented as a separate card that can be dragged and dropped to prioritize within specific lanes and move between lanes.
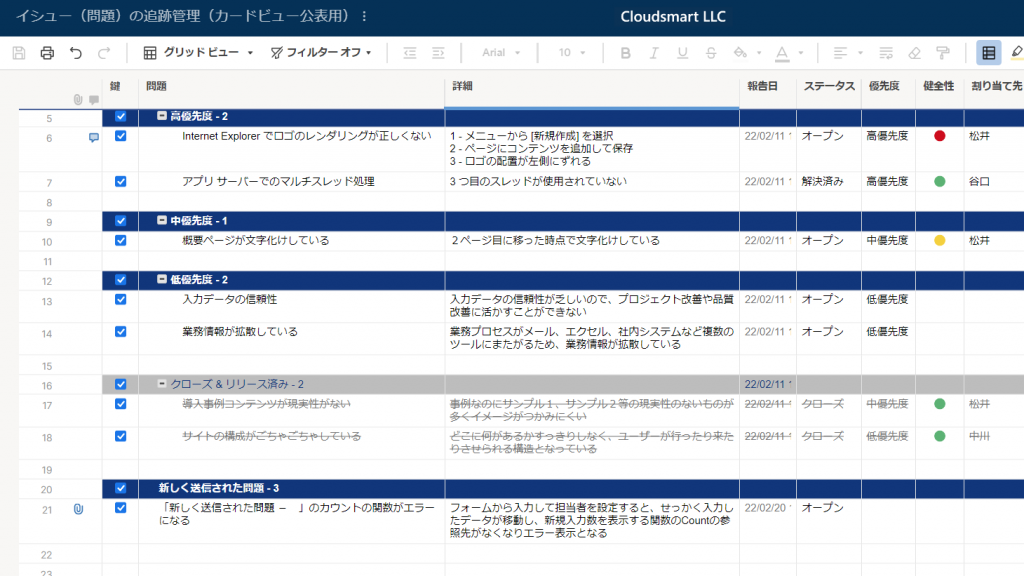
For example, you can see that the "garbled summary page" line in the grid view above is represented as a card in the card view below.
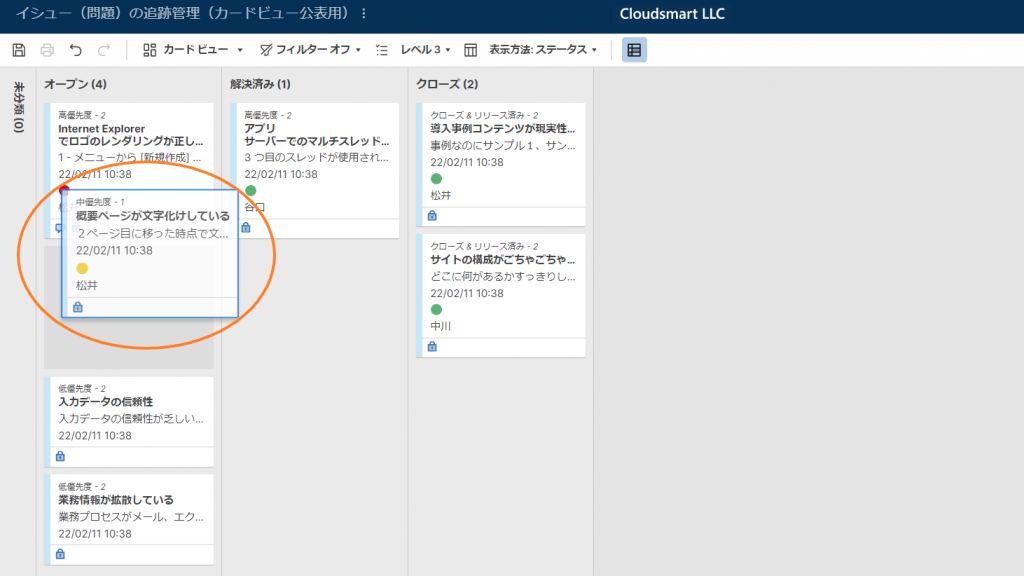
Changes are captured in real time on all devices, keeping teams up to date.
Moving cards between lanes updates the column values, but does not change the structure of the row or column position layout in the grid view.
Editing card information
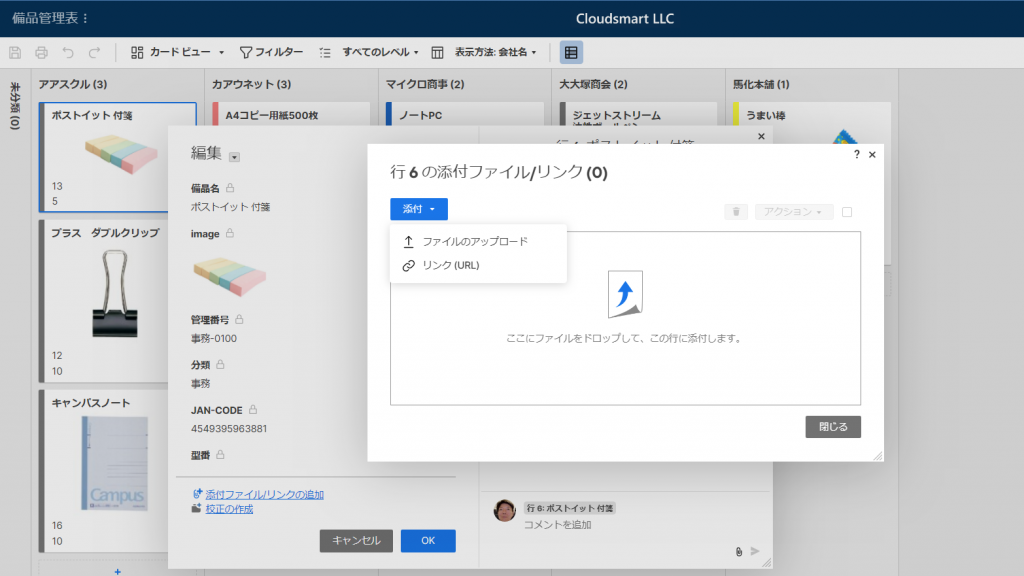
Column information can be accessed from any cardEdit by double-clicking on the cardcan.You can add attachments and comments directly to the card.
Card view folding and unfolding
You can also use the buttons in the upper right corner of the toolbar to collapse and expand the card view.
Display field customization
To customize the fields displayed on the card, click the gear icon to open the card view settings.
Creating a new card
New cards can be easily added using the plus button in each lane.
Change card color with conditional format
Conditional formatting allows you to change the color of the card based on the criteria of the rule.
Created from a basic card template
Status, size, importance, and assigned lanes are provided for easy management in Card View.
There is an "end" checkbox, but it is not a lane.
Below is the original help article
The Cards view is one of four views in Smartsheet that allows team members to drag and drop cards to collaborate, share, and work on projects to prioritize and organize their work more easily. Will be possible.Cardview is the result of an agile project management approach, but it also helps you to communicate and collaborate more visually with his Smartsheet within your team.
Card view: Create, edit and share cards
Card viewAllows you to organize the items and tasks in your project.Of the cardField valueDisplays task information. A card can display a total of 1 fields.It consists of a title field and up to 10 other fields.
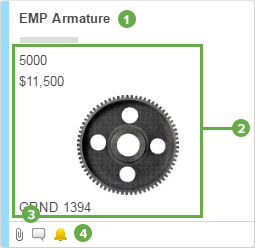
- The title of the card is always on the sheetPrimary columnWill be the field value of.For details, see "Help Center"Primary column."
- The fields on the card show task information.
- If the task contains attachments / links or comments[Attachment / link] , [comment] The icon is displayed.
- If you have set a reminder for the task, you will see the Reminder icon.
Creating a new card
To add a new task or item (card) to your project
- In the lane you want to add to the card, do one of the following:
At the end of the list of cards,[Add card] iconClick.
-or-
Right click on the card[Insert on] or sending us a message on Click Insert Below.
[edit] A window will open, so enter it.
- [edit] Enter the details in the window andClick OK.
In card view [Insert on] or sending us a message on [Insert below] Even if you specify, the new card will always be added to the end of the task list.That is, if you switch to the grid view, the new task will appear at the end of the list.
Editing the card
Add data to the card
- To edit a card or add data, double-click on the card [edit] Opens a window.
- Make changes,[OK] Click.
the imageInsertTo do the contents of the fieldDeselectOrhyperlinkAnd click the arrow next to the field name you want to edit.
Change the color bar of the card
There are two ways to change the color of the edge of the card.You can change it manually or automatically with conditional formatting rules.
To change the color manually:
- Right-click on the edge of the card.
- Select a color.
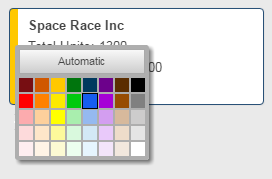
If you have admin or owner-level sharing permissions on the sheet, on the left toolbar [Conditional Format] You can click to create a rule and change the color.
For more information on conditional formatting, seeConditional formatting."
- If conditional formatting rules apply, override the manual formatting.
- Switching from card view to grid view, gantt view, or calendar view does not change the color of the card.
Share your card by email or request a renewal
To share the contents of the card or request input from other users[send] or sending us a message on [Send update request] Click and[send] or sending us a message on [Update request update] Opens a window.
By default, information for all columns in the sheet (including attachments / links and comments) is sent.This means that the information sent is not limited to the fields displayed on the card.To exclude columns[edit] Click the button to clear the check boxes for the column names you want to exclude from the email.
For more information, seeEmail sheets and rows"and"Using update requests."
Set the field
On the card[field] The data in (in the grid view, this data is displayed in the cell of the sheet) is displayed.The title is always displayed on each card.The title value is the value in the primary column.
Change the fields displayed on the card (requires administrator privileges)
A card can display a total of 1 fields.It consists of a title field and up to 10 other fields.If you have administrator privileges on the sheet, you can change the fields displayed.
- At the top right of Smartsheet [Card view settings] Click (gear icon).
- Select or clear the check box for the field name.
In the grid view, you can set and create parent and child rows to create a visual hierarchy on the sheet.For more information on this procedure, see Help Center.階層You can check it at.After creating the hierarchy(Title of parent line) You can display the task parent on a card in the card view by selecting a field.
Add new field
- At the top right of Smartsheet [Card view settings] Click (gear icon).
- Click Add New.
Adding a new field to the card view will add a new column with the same name to the grid view.For example, if you add a checkbox field named Done in the card view, a column named Done will be added to the far right of the grid view (with the checkbox column type).
Edit existing field properties
To edit the properties of an existing field, for example, to change the type or label, switch to the grid view (click Grid View on the left toolbar) and edit the column properties.Detail is,"Insert, delete, or rename columns."